

So, you’ve put a whole lot of work into growing a few marijuana plants. From seedling through the flowering process, you watched your plants grow from seed into mature cannabis plants that are now ready to harvest any day. A big part of cannabis cultivation comes at the end, the harvesting process.
That said, harvesting cannabis plants is not as easy as just chopping them down, drying the buds, and then rolling them into a joint. After all, growing cannabis is hard work, and you don’t it all to go to waste by not trimming your harvested weed properly.
There is actually a lot that goes into harvesting marijuana plants, which is why we are here today providing you with a complete home grower’s guide to harvesting marijuana plants.
We’ll first talk about how you know when it is time to harvest your marijuana plants, followed by what you’ll need, and a step-by-step process.
We’re going to take you through an in-depth tutorial on everything you need to know about harvesting marijuana plants. By the end of this article, you’ll be a total expert on harvesting cannabis plants for the best results.
How to Know When it Is Time to Harvest Cannabis Plants
One of the issues that so many people have is determining when marijuana plants are ready to harvest.
Well, there are a few different telltale signs that you can pay attention to which will inform you that harvest time is very near or upon you.
Let’s take a quick look at the most common signs that your marijuana plants are ready to be harvested after the flowering stage.
Pistil Color
The pistils on your cannabis plants are those hairs all along the outside of the buds. They start off milky white and gradually change color as the plant grows throughout the flowering stage.
They start off white but eventually turn dark orange or brown.
When roughly 75% of these pistils have turned brown or dark orange, that is a good indication that harvest time is upon you.
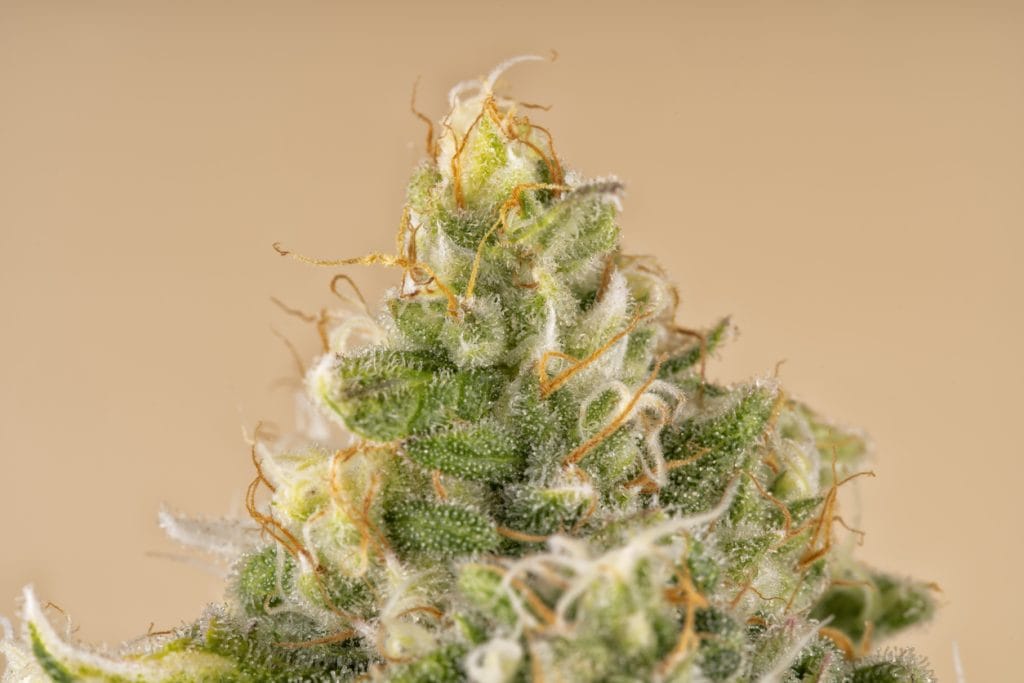
Trichome Color
On the outside of the cannabis buds, you should see white crystally structures, almost like very fine grains of sugar. Amber trichomes are a good sign,
These are the trichomes of the cannabis plant, and this is where the vast majority of the cannabinoids are contained, including all of that CBD and THC that you are looking for.
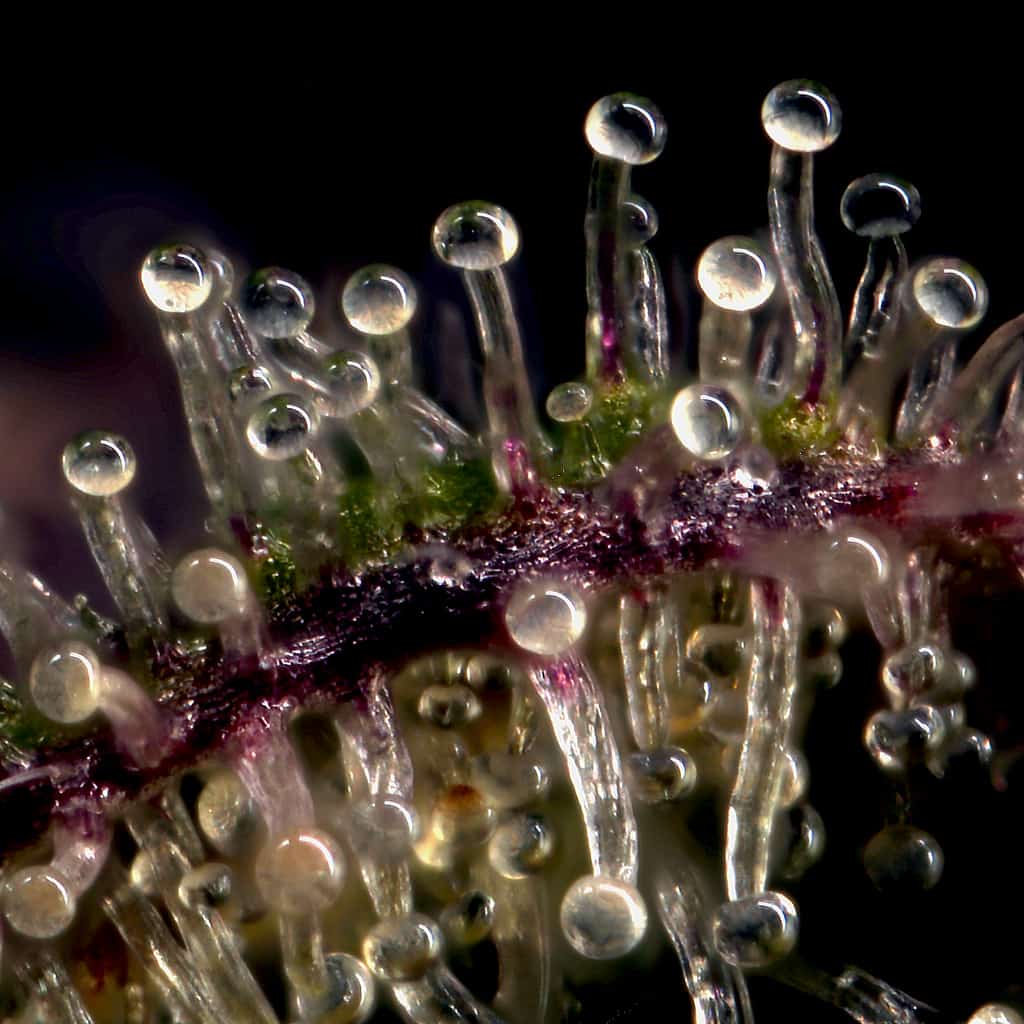
These are extremely small, and you’ll need to examine them to determine if it’s time to harvest the plants or not. You’re looking for amber trichomes here.
In fact, this is by far one of the biggest determining factors that inform you if the cannabis plant is ready for harvest near the end of the flowering stage.
The reason we say this is because most people aim to maximize both THC and CBD content, and by allowing the trichomes to mature to the perfect age, you can ensure that your buds have maximum cannabinoid content, which means that perfectly amber trichomes are important to wait for.
They’re so small that you’ll need either a microscope, a Jewelers loop, or a magnifying glass at the very least.
When looking at those trichomes, you’ll notice that they look like extremely small mushrooms, and if they are slightly amber in color or dark milky white, then it is time to harvest.
Remember that if most of them are still clear, then it is too early to harvest. However, if the vast majority of them are already brown or amber, then a lot of the THC has likely dissipated, which means that you’ve waited a little bit too long. If you have amber trichomes, don’t wait any longer!
Flower Structure and leaf Color
Although not nearly as big of indicators as the first two points above, you can always pay attention to the structure of the flowers.
You should see that the marijuana buds are fully formed and very dense. If they are still airy, wispy, and look very small, it could be an indication that your plant is not yet fully ready to harvest.
Furthermore, if your marijuana plant is ready to harvest, you should notice some of the fan leaves starting to turn yellow, as the plant does not require them anymore.
If most of the fan leaves have already weathered or turned yellow, then you might have waited a little bit too long.
Odor
Another telltale sign that your marijuana plant is ready for harvest is if it is emitting an extremely strong odor.
That being said, you cannot rely on the odor alone, because your marijuana plant will start to smell as soon as it starts flowering. However, the stronger the smell gets, the closer you are to harvesting time.
Other Tips About Harvest Time
The reality is that determining when to harvest your marijuana plants can be quite difficult, and things look a little bit different if we are talking about outdoor crop.
Yes, you still need to pay attention to all of the above factors for outdoor crop, just like indoor crop, with the pistils and trichomes being the two most important things.
However, when growing outdoors, you also need to pay attention to the weather. You don’t want the weather ruining your marijuana plants because you waited too long.
Therefore, if you see that there might be massive rain storms, cold snaps, or other types of storms, you might decide to harvest slightly earlier.
Of course, harvesting the marijuana plant before the optimal time is not ideal, but it’s always better to harvest a week early than it is to have a storm completely kill the plants.
This is especially the case if we are talking about cold weather. If there is a frost in the forecast, you absolutely need to harvest the plants before the frost hits, or else the cold temperatures will cause the THC to degrade.
What You Need to Harvest Marijuana Plants
You will need a variety of tools to harvest, dry, and cure your marijuana buds, so let’s take a quick look at everything you’ll need.
- Pruners or garden shears
- Scissors
- A clean surface
- Several bowls and trays
- Rubbing alcohol
- Spare rags
- Clothes you don’t mind getting dirty
- A horizontal pole and string, hooks, or hangers
- A dehumidifier
- Mason jars
- Hygrometer
- Air fan
With all of the tools and pieces of equipment above, you should now have everything you need to go through the harvesting, drying, and curing process.
As you can see, there really aren’t all that many things that you need here. The most important part of all is of course the marijuana plants themselves.
How to Harvest Weed Plants: Step by Step
Now that you know when it is time to harvest, and you’ve got a good idea of all of the equipment you will need, you can get to the first step, which is flushing the plants.
1. Flush the Plants
Once you suspect that harvesting time is getting close, you need to start flushing the plants. Flushing cannabis plants is the practice of giving them plain water without any kind of added fertilizers or nutrients for about 10 days before the harvest process.
This allows the nutrients, minerals, and fertilizers to flush out of the plant. You don’t want any of those substances in the plant when you harvest it, because they don’t taste good, they don’t allow for a smooth smoke, and it’s probably not that healthy either.
You want to spend about 10 days flushing your marijuana plants, and about seven days before the flushing process starts, start gradually reducing the amount of nutrients you give them.
Once you start flushing, when you do flush your marijuana plants, only give them water that has been pH balanced to a level ranging between 6.0 and 6.8.
The water should be slightly acidic, but never alkaline. Furthermore, when you are flushing your marijuana plants, always give them enough water so that you see water draining out of the bottom of the buckets.
This will ensure that all of the roots are being flushed thoroughly and that as many of the unwanted substances are being flushed out as possible.
If you see that the marijuana plants leaves are starting to turn yellow, this is normal during the flushing process, as this is the plant using up its last nutrient stores.
Once you are getting near the end of the flushing., you need to start really keeping an eye on things to determine when the optimal harvest time is.
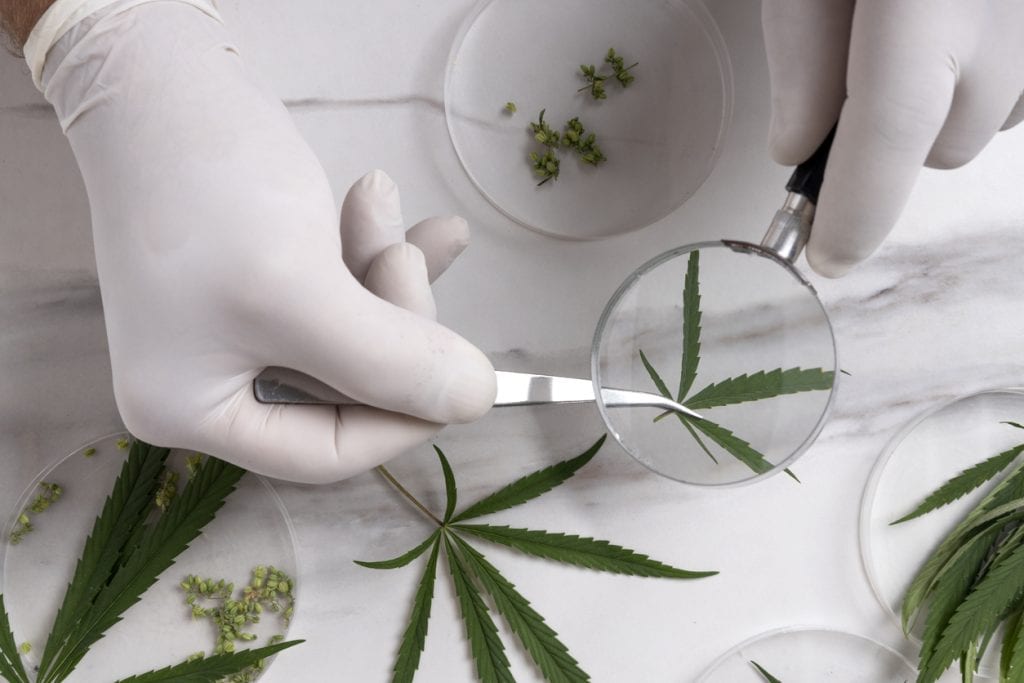
2. Determine the Optimal Time for Harvesting Cannabis
We already talked about this above, but now is the time for you to really observe and examine your marijuana plants on a daily basis to try and determine when the best day to harvest cannabis is.
This is somewhat of a trial-and-error type of exercise, because you’re going to keep checking back every single day and using your own judgment to determine when harvest time is.
Once again, keeping an eye on those trichomes and pistils are the two best ways to determine when it’s time to harvest cannabis.
Once you see that roughly 75% of the pistils are amber, it’s time to harvest. If the trichomes are all a Milky white color, it’s time to harvest.
3. Wet vs Dry Cannabis Trimming
Before you can harvest cannabis plants, you’ll first need to decide that whether you want to dry or wet trim.
There are some differences between dry trimming and wet trimming that you need to know, with each technique having its advantages and disadvantages. What it really comes down to are what your needs and personal preferences are.
Wet Trimming
First, we have wet trimming, which means that you trim your cannabis plants right after you harvest cannabis, while the buds and branches are still full of liquid.
Many people prefer wet trimming because it’s generally quite easy and fast as the leaves are still soft and easy to work with.
Wet trimming often results in the buds looking much nicer as well, because getting a precise cut is much easier when the buds still stick together.
Furthermore, wet trimming is also beneficial for drying time because when you cut the buds and branches apart, you expose more surface area to the air, therefore allowing for moisture to dissipate much faster.
Wet trimming may also be ideal because it can help remove some of the chlorophyll from the buds, therefore improving both the smell and taste of your final product.
One of the only drawbacks of wet trimming is that it may in some cases increase the chances of mold occurring.
Dry Trimming
We then have dry trimming, which is characterized by trimming the marijuana buds once they have already been dried well after the cannabis harvest.
Many people prefer dry trimming their cannabis buds because it allows them to keep a lot more of their natural trichomes because they’re not disturbed like they are during wet trimming, which ultimately results in more potency and flavor.
Some people may also prefer the look of buds that have been dry trimmed, as they look a bit more rugged and natural.
Some people also feel that dry trimming is easier because the buds aren’t quite as sticky, which some people think makes them easier to work with. If you want to be able to control the drying process more effectively, then dry trimming is also ideal.
If you want to make life easier for yourself, we recommend dry trimming, because it may be a little easier to manipulate the buds if they aren’t sticky and wet anymore, plus hanging them up to dry is much easier when they’re still attached to the branches and stalks.
It’s really hard to hang already trimmed cannabis buds up to dry effectively. We also recommend dry trimming to preserve as much of the potency as possible.
Now that you know what the differences between wet trimming and dry trimming cannabis are, you can make an informed decision as to which process to follow.
4. Equipment to Harvest Cannabis Buds
Now it is time to get your equipment ready to harvest cannabis, which means that you need to get your garden shears and scissors ready to chop the cannabis plants down.
If you are doing wet trimming right after cannabis harvesting, you’ll also want to get various pieces of equipment ready, including the following:
- Scissors/Shears
- Rubbing Alcohol
- Gloves
- Bowls
- Additional Containers
You’ll also need to get a space ready to dry your cannabis buds, which is something we will take a much closer look at further below, because the drying process is an integral part of the harvesting process.
If you don’t properly dry your buds after they have been harvested, you’re going to run into some very serious issues.
Make sure that you have all of the equipment for cannabis harvesting on hand and ready to go as we have listed in the above section.
5. Cut Down the Plants
Before you harvest cannabis, make sure that you have a clean space to place them in. You are now going to take your garden shears and cut down the marijuana plants.
Make sure that the garden shears are totally sterile first, so it may be a good idea to clean them with isopropyl rubbing alcohol.
Doing so will help ensure that no germs or other unwanted substances are passed onto the plant matter.
Take your garden shears and make a single cut right at the bottom of the plant, just a few inches above the soil.
You can continue doing this and placing the cut down marijuana plants horizontally on that clean surface that we discussed just above. Most people would just lay them down on a clean floor.
6. Break the Plants Down
Once the marijuana plants have been cut down, they will need to be dried to prevent mold from occurring, to make them more smokable, to increase their potency and flavor, and more.
However, before you can dry your marijuana plants, you first need to break them down a little bit more.
You don’t need the stem for anything at all, as it does not contain any or much THC, so you may as well cut it away.
If you leave the various branches attached to the stem, it’s going to keep supplying them with water for a prolonged period of time, therefore making the drying process take longer. Chopped plants dry much faster.
Therefore, it is best to take scissors or your garden shears and cut away the major branches from the stem.
You can then throw the stem away or use it for other purposes. Some people may chop the stems down and use them to make bubble hash or other types of extracts.
7. Hang the Cut Down Plants Up to Dry
You now need to hang the plants up to dry, which should be done in a dedicated drying space. You should prepare a room or a closet for this exact purpose, a controlled environment, so to speak.
As mentioned above, you’ll need somewhere to hang those cannabis branches up from. You may want to use some kind of horizontal pole that you would usually hang your clothes from.
You could also screw hangers into the ceiling, use some string and tape to hang the branches from the ceiling, or whatever else you have at your disposal.
The bottom line however is that the cannabis buds need to be hung in the air, and they need to be hung upside down with the main buds or colas facing downwards.
The ideal humidity range for drying cannabis buds is between 45% and 55%. This means that you will likely need a dehumidifier, especially if you live in a moisture climate, or else the buds will take too long to dry it may get moldy, or may not dry properly at all.
You always want to use a hygrometer to measure the humidity levels in your drying area to ensure that they are ideal for the purpose at hand.
To speed up the drying process, and to prevent mold from occurring, you can also point an air fan at the buds to provide them with some air flow and circulation.

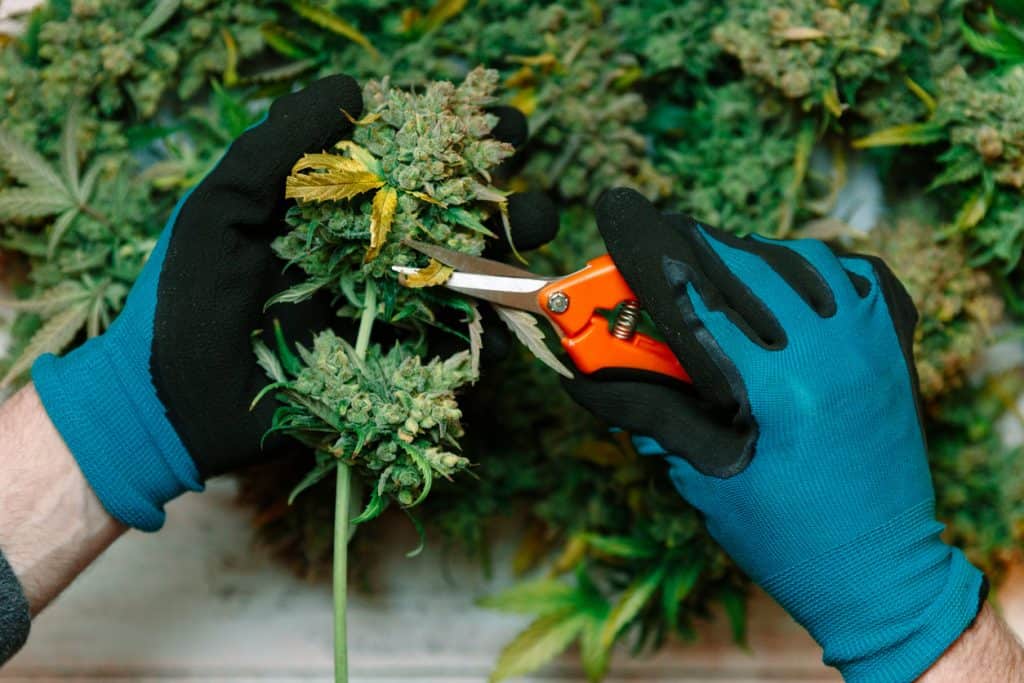
8. Trim and Manicure the Buds
Now it’s time for you to trim and manicure the buds, and seeing as we are talking about a dry trimming process here, the trimming is taking place after the buds have been dried.
Your, you’re going to put on some dry powdered latex gloves, at least if you don’t want a lot of plant matter sticking to your fingers.
You are then going to take your scissors, or even better, small trimming scissors, and start cutting the main buds away from the branches.
Many people also choose to cut away smaller stems, sugar leaves, and anything else that doesn’t look nice.
People often like to trim smaller leaves off of the outside of the buds because they don’t look nice and because they aren’t overly potent.
The main point here is that you should be left with nothing but the buds. Once you have cut away all of the excess, the only thing left to do is to cure your cannabis buds.
9. Allow the Buds to Cure
To cure your cannabis buds, you’ll need some Mason jars or other airtight containers. This is an essential part of the process.
The whole point of curing your cannabis is that it allows any remaining moisture to evenly distribute within the buds, although there really shouldn’t be much left.
Furthermore, the curing process also allows the THC and other cannabinoids to increase in potency ever so slightly.
At the same time, the flavor also gets better, with a lot of the remaining chlorophyll dissipating, therefore leaving you with just the flavor of the marijuana, as opposed to the green plant matter, which you really don’t want.
Keep in mind that the minimum curing time for cannabis is roughly two weeks, with the average being about three or four weeks, and some people go for as long as six months.
The longer you cure your cannabis for, the better the overall flavor, potency, and result will be. Curing your cannabis buds simply means putting them inside of airtight containers, ideally an ounce or less per container.
You then want to store these in a dry, cool, and dark place.
You will then need to perform a process known as burping, which means that you’ll open them up around once per day for just a couple of minutes for some much-needed air exchange.
Once at least two weeks have gone by, the curing process should be complete, and your journey has come to an end.
Conclusion
You should now have in-depth knowledge of what exactly harvesting your cannabis plants involves.
Just make sure that you harvest them at the appropriate time, and follow all of the tips that we have provided here today. If you do so, the results should be out of this world.